You’ve heard the phrase, “You’re never too old to learn something new.”
Well, how about putting that to the test and teaching yourself to be more flexible than ever?
You might think that split training is reserved only for elite gymnasts and the über flexible among us, but with a little training, anyone can master them.
And although it is one of the most demanding positions you can manipulate your body into, many health benefits are associated with increasing your flexibility. Experts agree that optimal joint range can lower your injury risk and improve your quality of life.
Ready to bend your body like a pretzel and push yourself to the limits to show off your splits?
Let’s get into it…
The different types of splits
What do we mean by splits?
Because there isn’t just one type, although both require increased flexibility in the hamstrings, hip flexors and glutes.
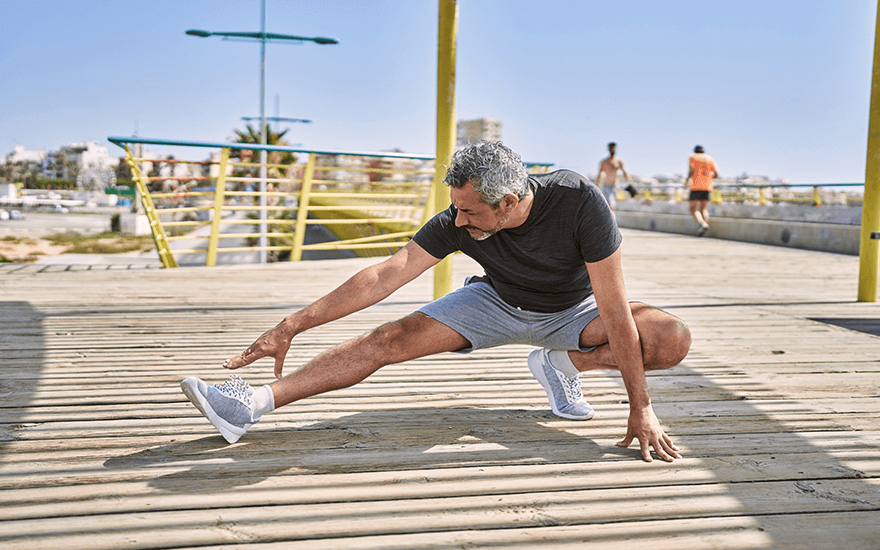
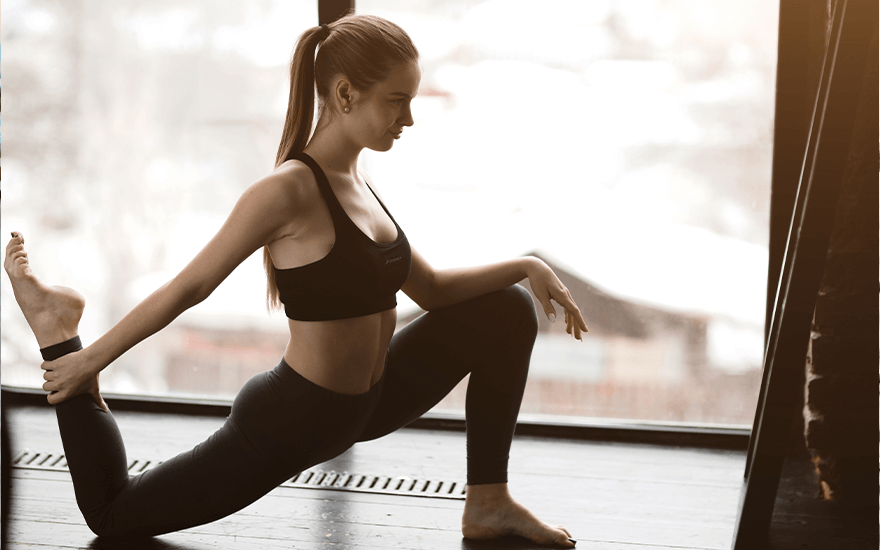
The Front Split
The front split is probably what pops into your head when considering taking on the challenge. Start your front splits from a low lunge position with your back knee down. Place your hands on your hips with your back toes pointed and the top of your foot resting on the ground. Slowly slide your front foot forward, keeping your toes pointed, and simultaneously slide the right foot back. Use your arms for stability. Stop once you feel an intense stretch and hold that for 20 seconds before returning to your starting position. The Side Split
The side split is slightly different and requires more flexibility in the inner thigh muscles and the hip flexors. Sit with your upper body firmly against the wall and your torso straight and static. Check to ensure your lower and mid-back are flat against the wall. Open your legs slowly and as wide as you can. Use your hands as support. The idea is to stretch each leg out while keeping your torso upright slowly. It may take some practice, but you’ll get there with persistence. |


Where to start with split training…
Not quite there yet?
If your flexibility isn’t your strong point, throwing yourself straight into splits is not recommended – it will only lead to injury.
You need to ease yourself in and carry out some exercises and stretches in preparation. You’ll need to focus on strengthening your hip flexors, adductors, glutes, hamstring, and groin muscles and keeping your legs straight.
It’s going to take patience, perseverance and resilience, so if you’re ready to put yourself to the test and reap the reward, let’s get cracking…
Split preparation
Increasing flexibility is all about improving mobility and quality of life, so you want to ensure that you are not risking injury. It’s important to perform an adequate warm-up of at least ten minutes to relax the blood pumping and muscles. You’ll need to stretch regularly to get your muscles loose, and consistent practice is vital.
Don’t overstretch; make sure it feels like a good stretch, but remember that pushing it will lead to injury. If it’s painful, you’re overdoing it.
When stretching, hold each one for around 20 seconds and repeat three times. Also, don’t bounce, as it can cause an injury.
Focus on quality stretches each time, ensuring your hips are square and your back leg turned under. Your knee should be above your ankle with your toes pointing forwards.
For beginners, it’s advisable to use cushions or pillows to stretch until you can comfortably hold an intense stretch to the floor. Remember, supported splits are better than none at all.
Three stretches to get you doing the splits…
You need to increase flexibility in the hamstrings, glutes, and hip flexor muscles, and these three stretches combined will help you gain enough flexibility to start sliding into the splits (front or side).
Stretch 1: The “Runners Stretch”

The “Runners Stretch” is a deep stretch to train your muscles to relax. Move your foot to a lunge position while keeping your toes pointed forward.
Your knee should be above your ankle, and keep your other leg straight. Try to place your hands or elbows on your front ankle. Get as close as you can- enough to feel a stretch, but not pain.
Hold the stretch for 20 seconds. Breathe slowly and comfortably.
Stretch 2: Half splits
This stretch is a halfway house to the splits that will stretch the same muscles but with a lot less intensity – getting you warmed up for the real thing.
Sit on your back heel with your front leg stretched out in front of you. Slowly bend forward at the waist until you feel the stretch, and hold for 20 seconds. Breathe slowly and comfortably.
Stretch 3: Low lunge quad stretch.
Go back to your starting lunge position and grab your back foot, pulling it towards you and underneath your buttocks.
Hold for 20 seconds. Breathe slowly and comfortably.
Once you have completed three sets of the above exercises, you can attempt the splits. But don’t push yourself. You won’t get there immediately; if you need, you can use yoga blocks or chairs to prop yourself up.
Remember, it’s the stretch you should feel, not the pain. Pain leads to injury, so ensure you are performing the exercises sensibly and hold it in a stretch that isn’t painful.
How long does learning to do the splits take?
Don’t expect to get there the first time you try it (though kudos if you do); it may take weeks or even months to reach your target, but if you keep at it every day, your body will get used to the stretches and become more flexible, enabling you to stretch slightly further each time.
How long it takes you to do the splits comfortably will depend on your starting point, how often you practice, and your natural flexibility. Much like building muscle, gaining flexibility takes time.
But with daily stretching, you can see progress in just a couple of weeks. We recommend you measure your progress, which won’t always look impressive but will keep you motivated.
Progress might include:
- How far you can stretch
- Being comfortable in the stretch
- Holding the stretch for longer
Practice makes perfect, but it’s important not to overdo it. After each practice session, ensure enough time for any muscle soreness to subside before attempting another round.
Ready to learn the splits…
It’s not just for the yogis and gymnasts; learning the splits will help improve mobility, reduce the chance of injury, decrease pain and improve your quality of life.
While the challenge might seem daunting, slow and steady stretching will help you gain the flexibility required to slide straight into the splits. But be aware you need to keep it up, or that newfound flexibility will be over quicker than Christmas.
Related Articles
Dolph Lundgren Workout Exclusive: The Three-day Training Split
Expert Reveals Why You Should Take It Outside
Full Body Stretches You Can Do at Home to Let Your Body Know That Sleep Is on Its Way
Want An Impressive Party Trick? Learn To Master the Human Flag with Scott Mathison